Create Jira tickets
Harness STO allows you to create individual Jira tickets for security issues detected during scans. This feature improves collaboration across teams and simplifies issue tracking. This document is organized into the following sections:
- Create Jira tickets for security issues
- Access Jira tickets from STO
- Set up Jira integration for STO
- This feature is not supported in Self-Managed Enterprise Edition.
- It is supported for both Security Testing Developer and Security Testing SecOps roles.
This integration has a separate setup path that is unrelated to other Jira-related integrations in Harness pipelines. To open Jira tickets for security findings in STO, you must set up the integration as documented below. You cannot use other Jira workflows to create Jira tickets in STO. For example, you cannot integrate Jira with STO using Custom steps with Jira Create or other related steps.
Create Jira Ticket for a Security Issue in STO
To create a Jira ticket from a security issue detected in STO scan results, follow the steps below.
Before you begin, you must complete a one-time setup to configure your Jira connector. For instructions, see Set up Jira Integration for STO.
Jira tickets can only be created for targets that have baselines configured. For more information, see Targets, baselines, and variants in STO.
-
Go to the Security Tests tab from a pipeline execution or from the Executions section in the left navigation panel.
-
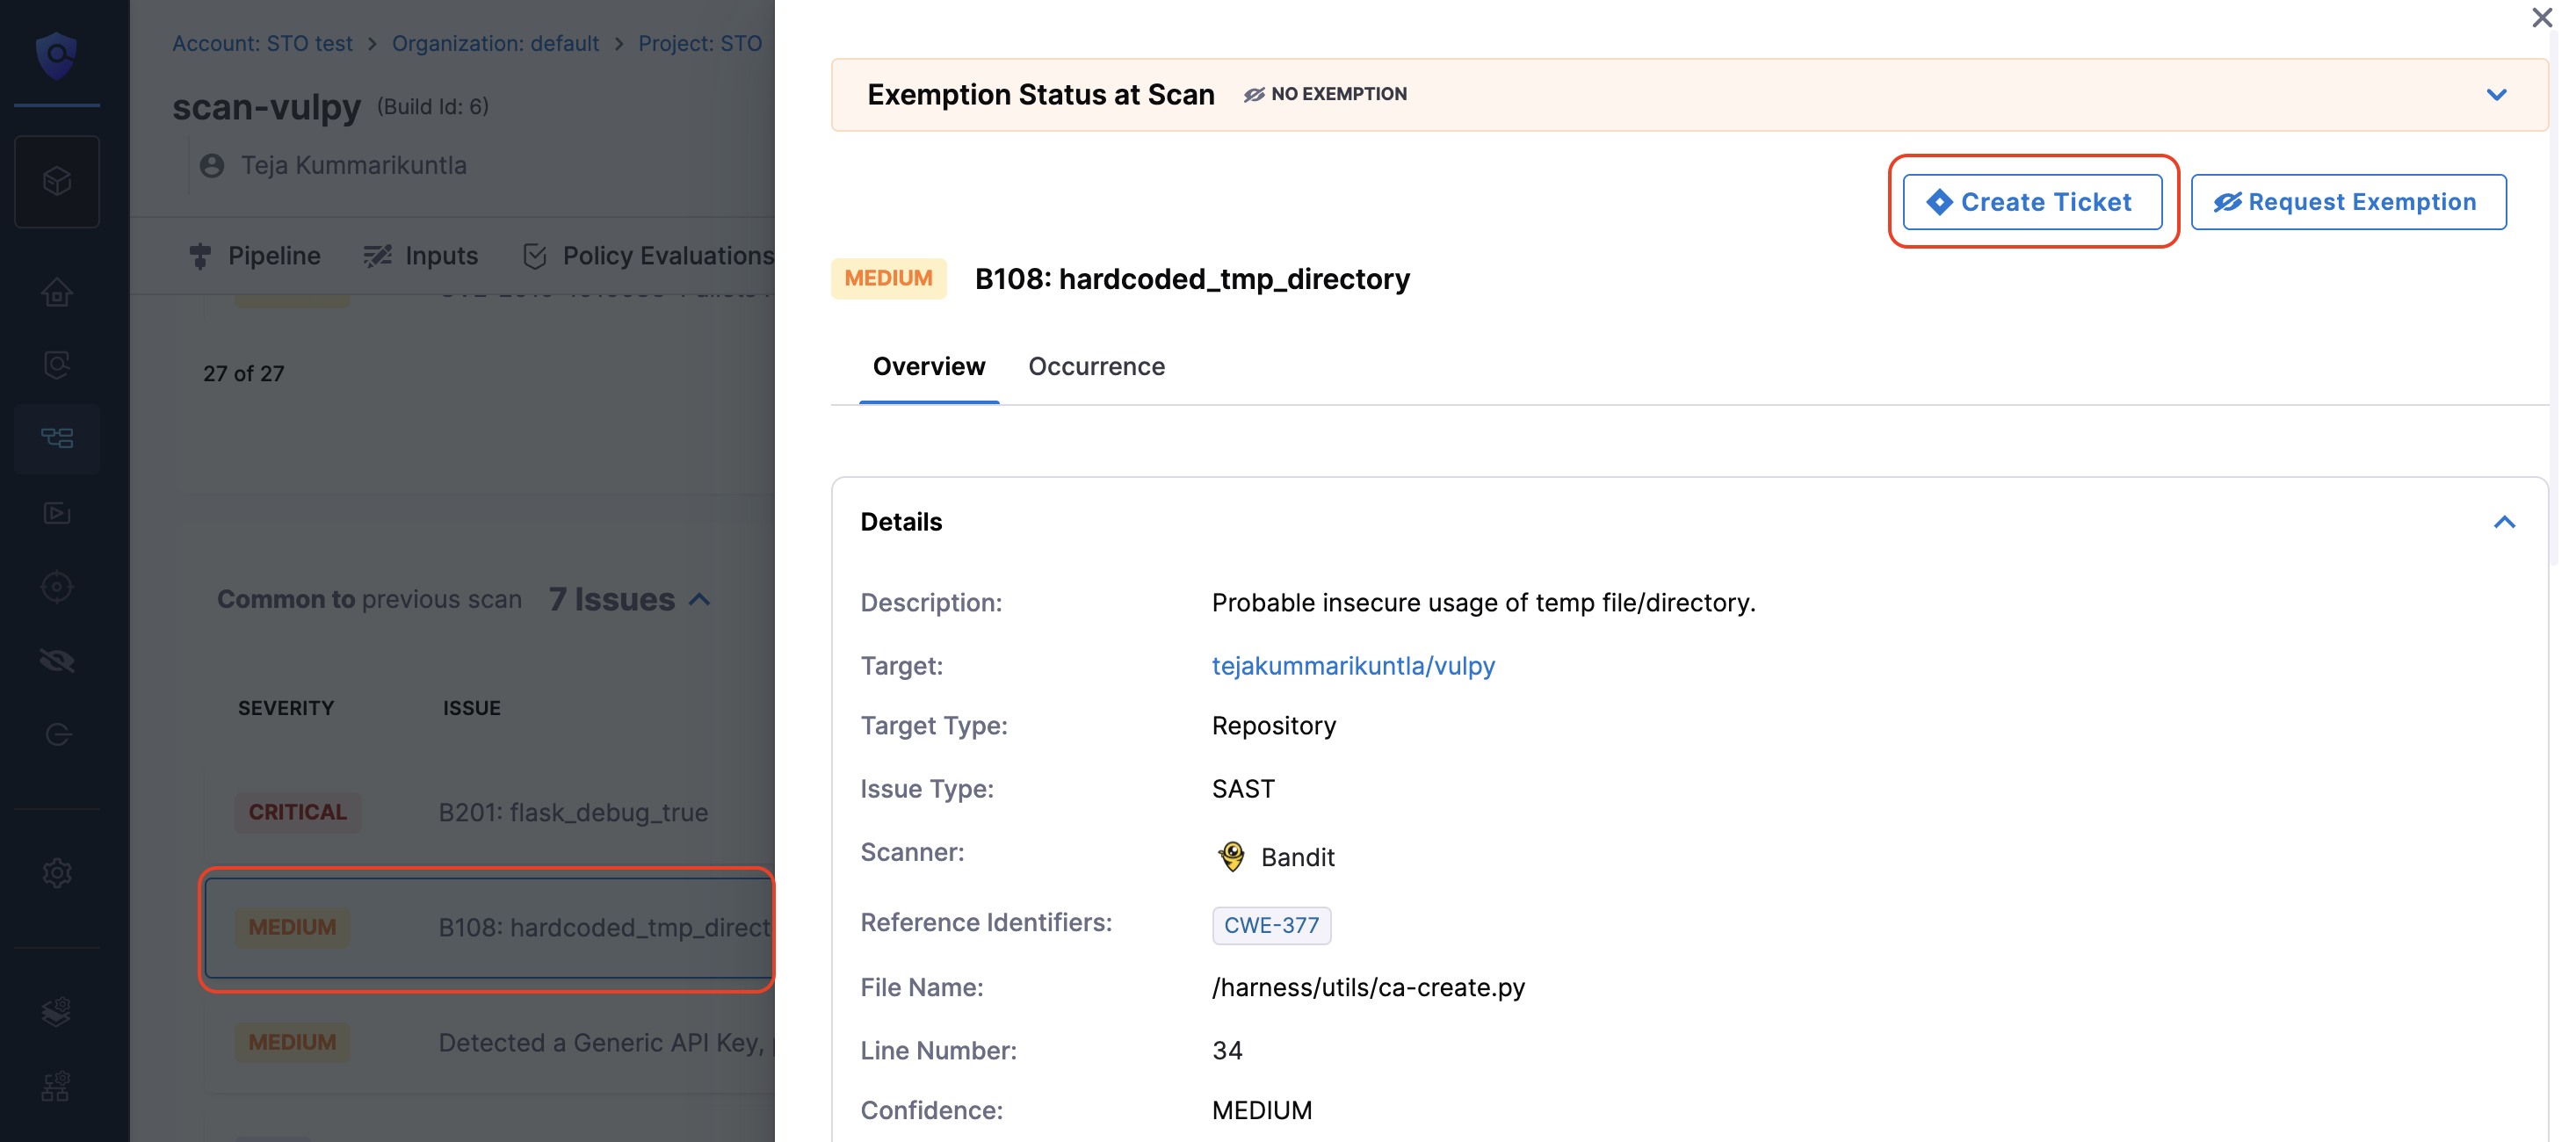
Locate and select the issue for which you want to create a Jira ticket, then click Create Ticket.
-
In the Create Ticket in Jira dialog, configure the following fields:
- Scope: Choose where the ticket should apply:
- This Target – Creates a ticket for all instances of the issue in the selected target.
- This Project – Creates a ticket for all instances of the issue across all targets within the project.
- Jira Project: Select the Jira project where the issue should be created. This list is populated based on your configured Jira connector.
- Issue Type: Choose the type of Jira issue to create.
- Title: Enter a title for the Jira ticket.
- Notes: (Optional) Add any additional context or information relevant to the issue.
- Scope: Choose where the ticket should apply:
The fields shown in the Create Ticket in Jira dialog are dynamically populated based on the selected project and issue type. Only required fields are displayed.
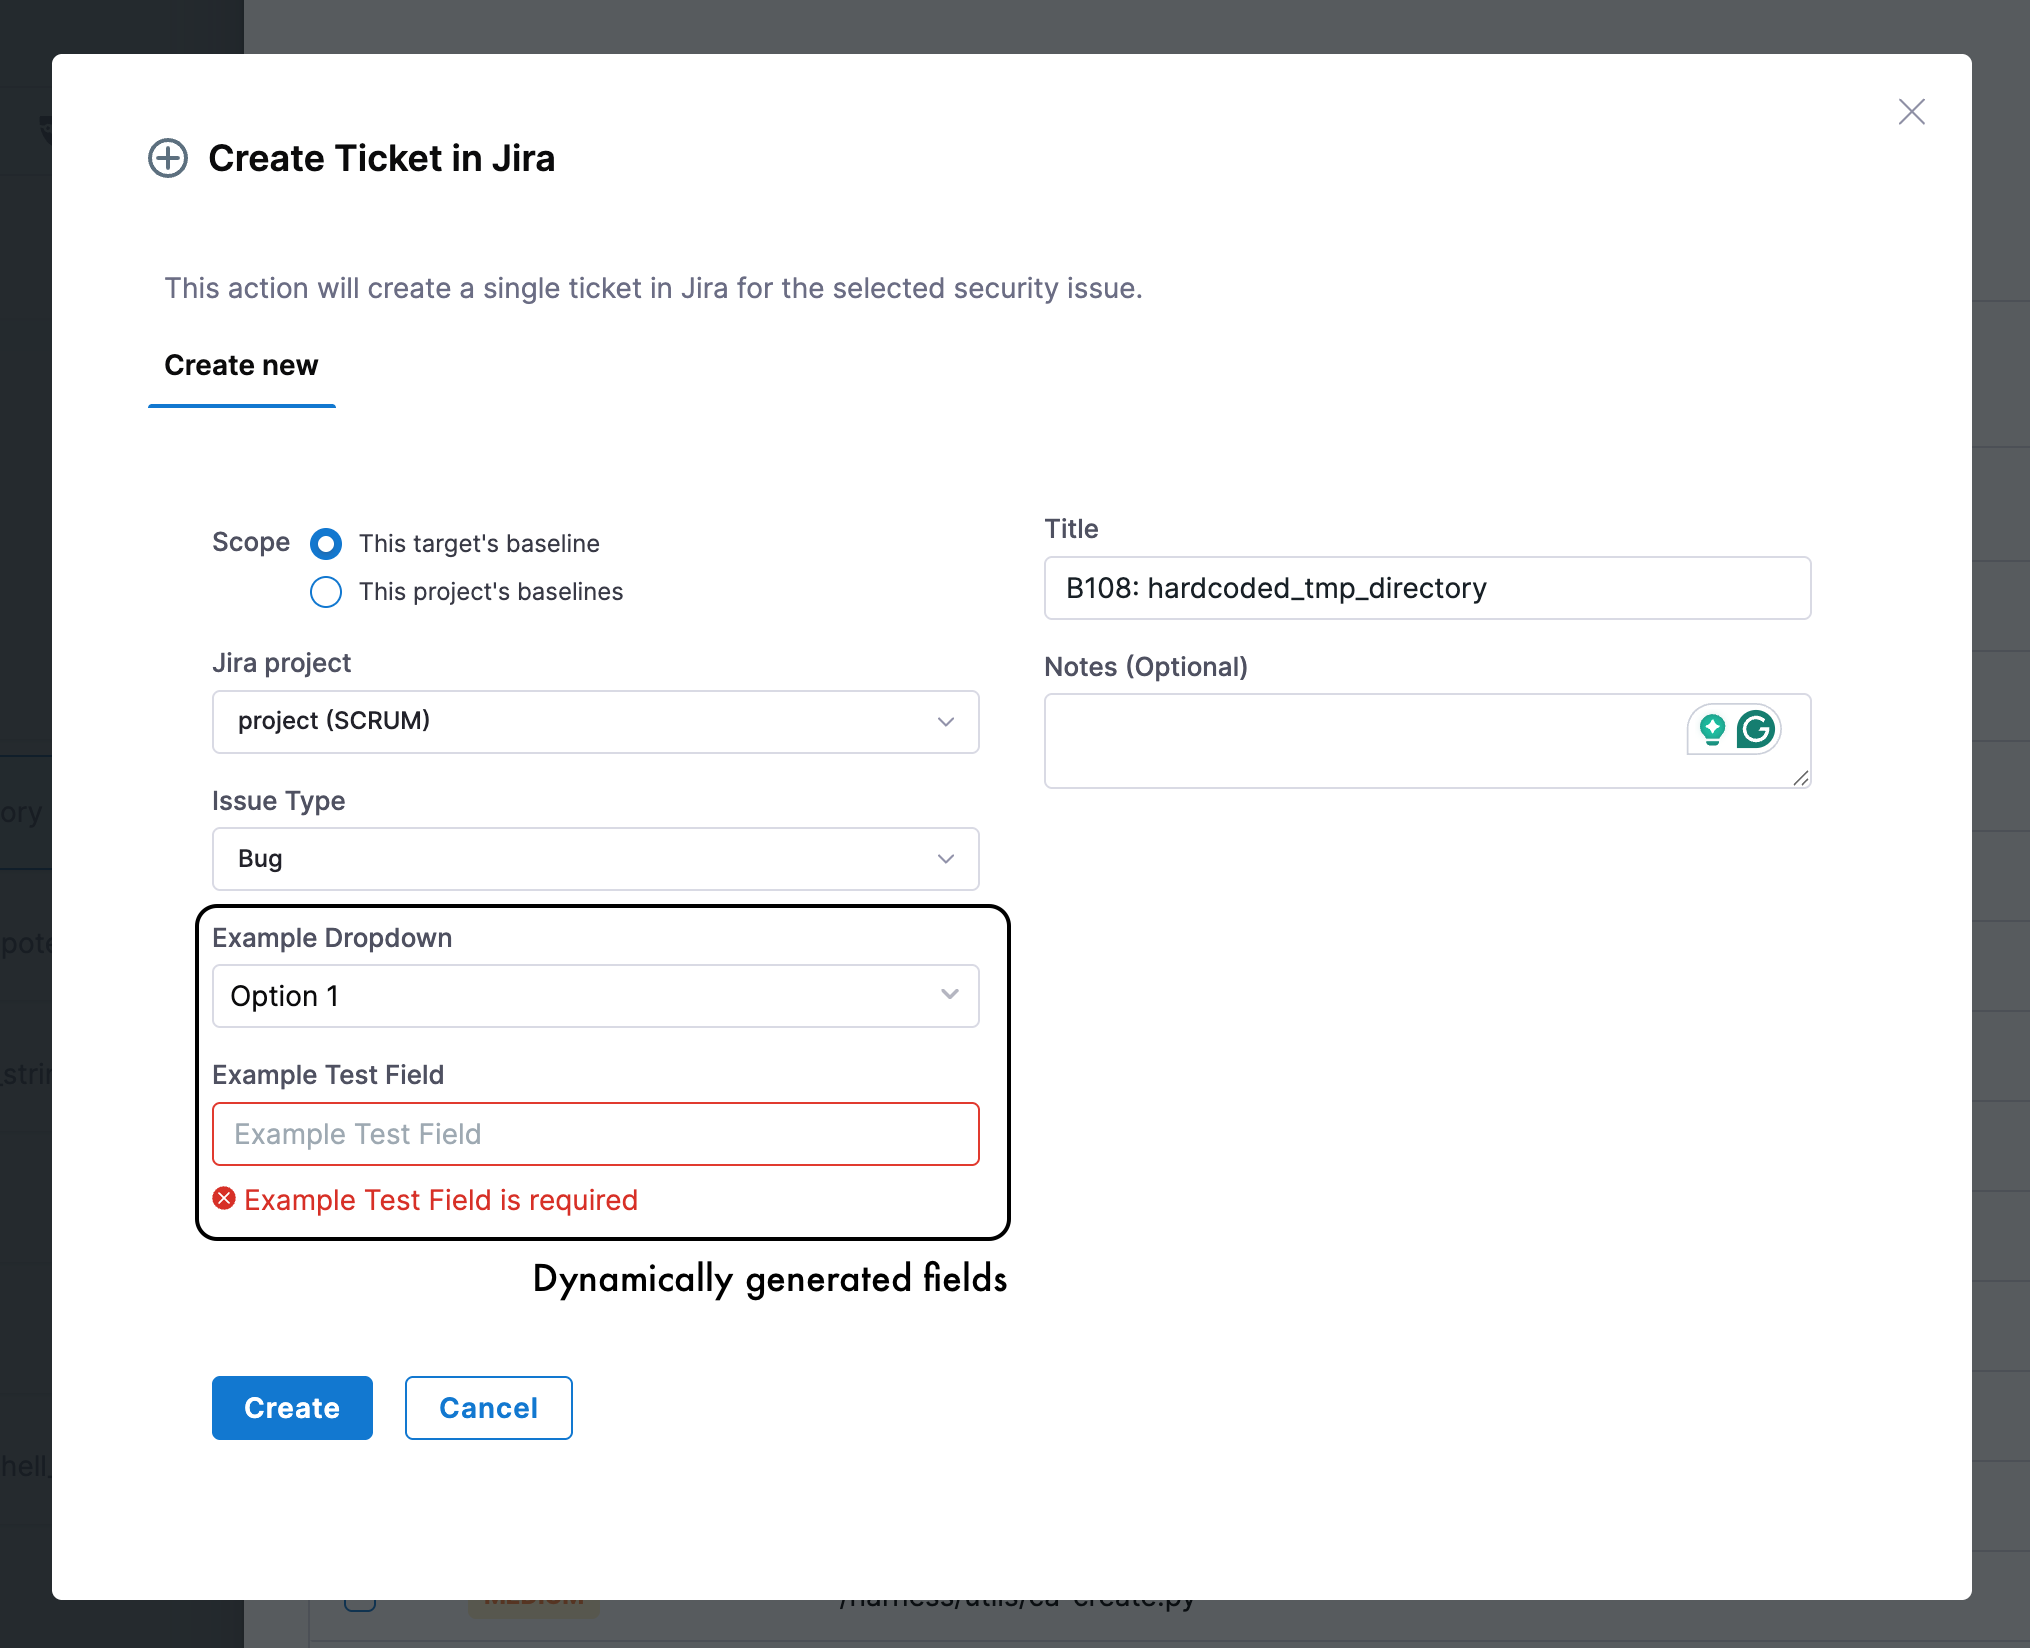
- Click Create. The Jira connector will send the request to the Jira API and create the ticket.
Access Jira tickets from STO
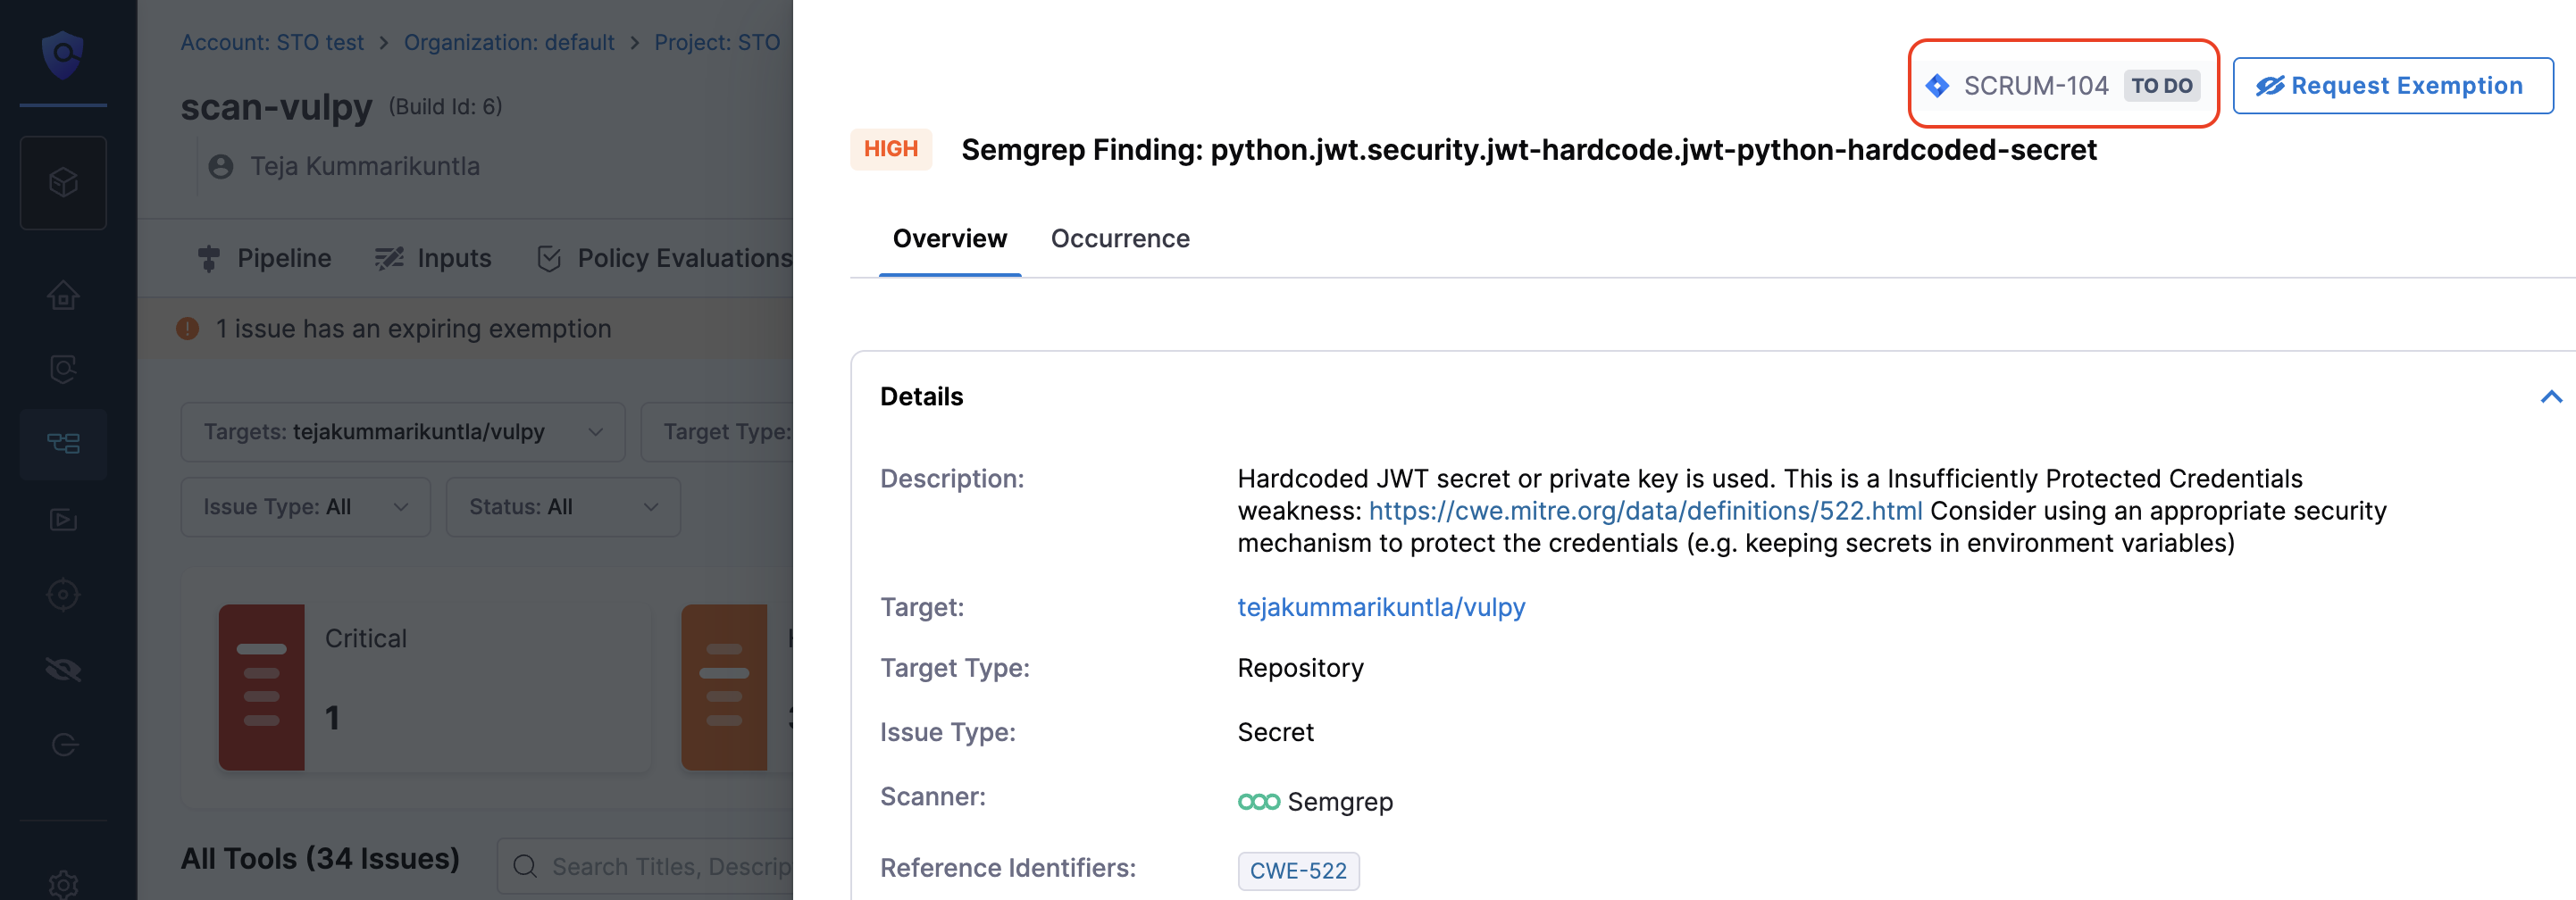
Once a ticket is created, you can access the corresponding Jira ticket from the issue details page where the ticket was created. The Create Ticket button will be replaced with the Jira issue number. By clicking on this number, you will be directed to the Jira ticket.
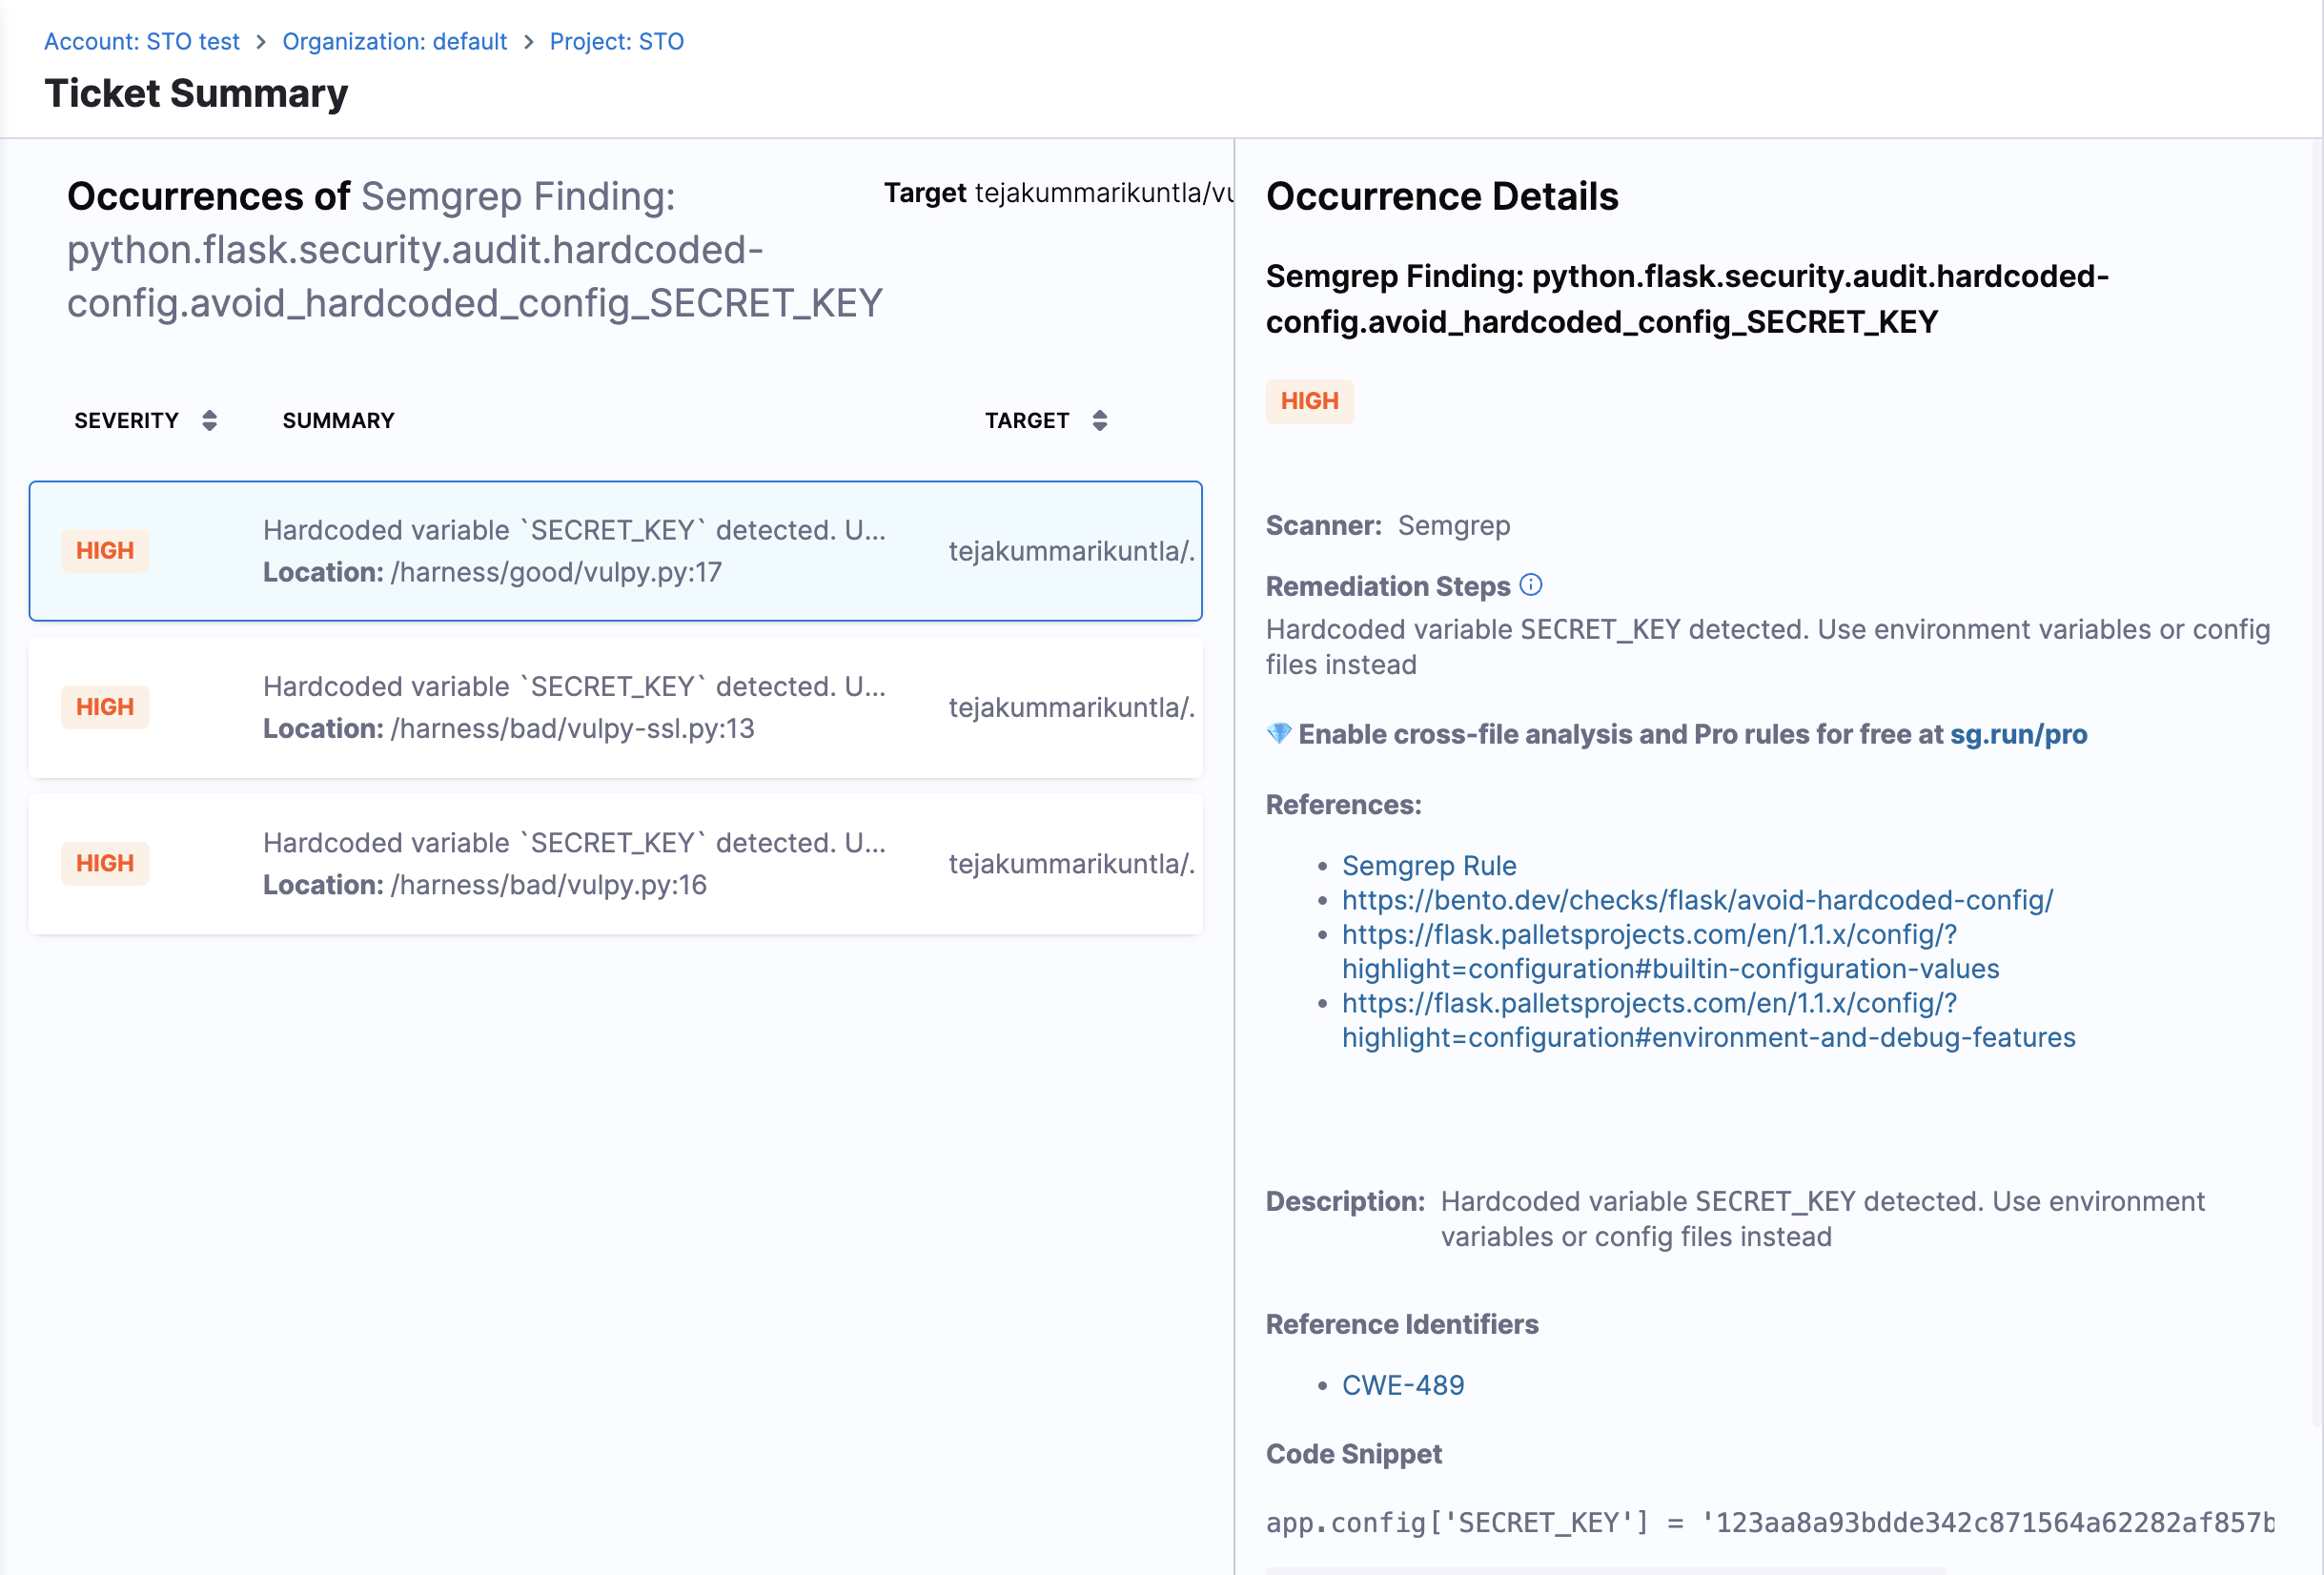
In addition to the issue details in the Jira ticket, a link back to the detected issue in the STO UI will be added to the description of the Jira ticket.
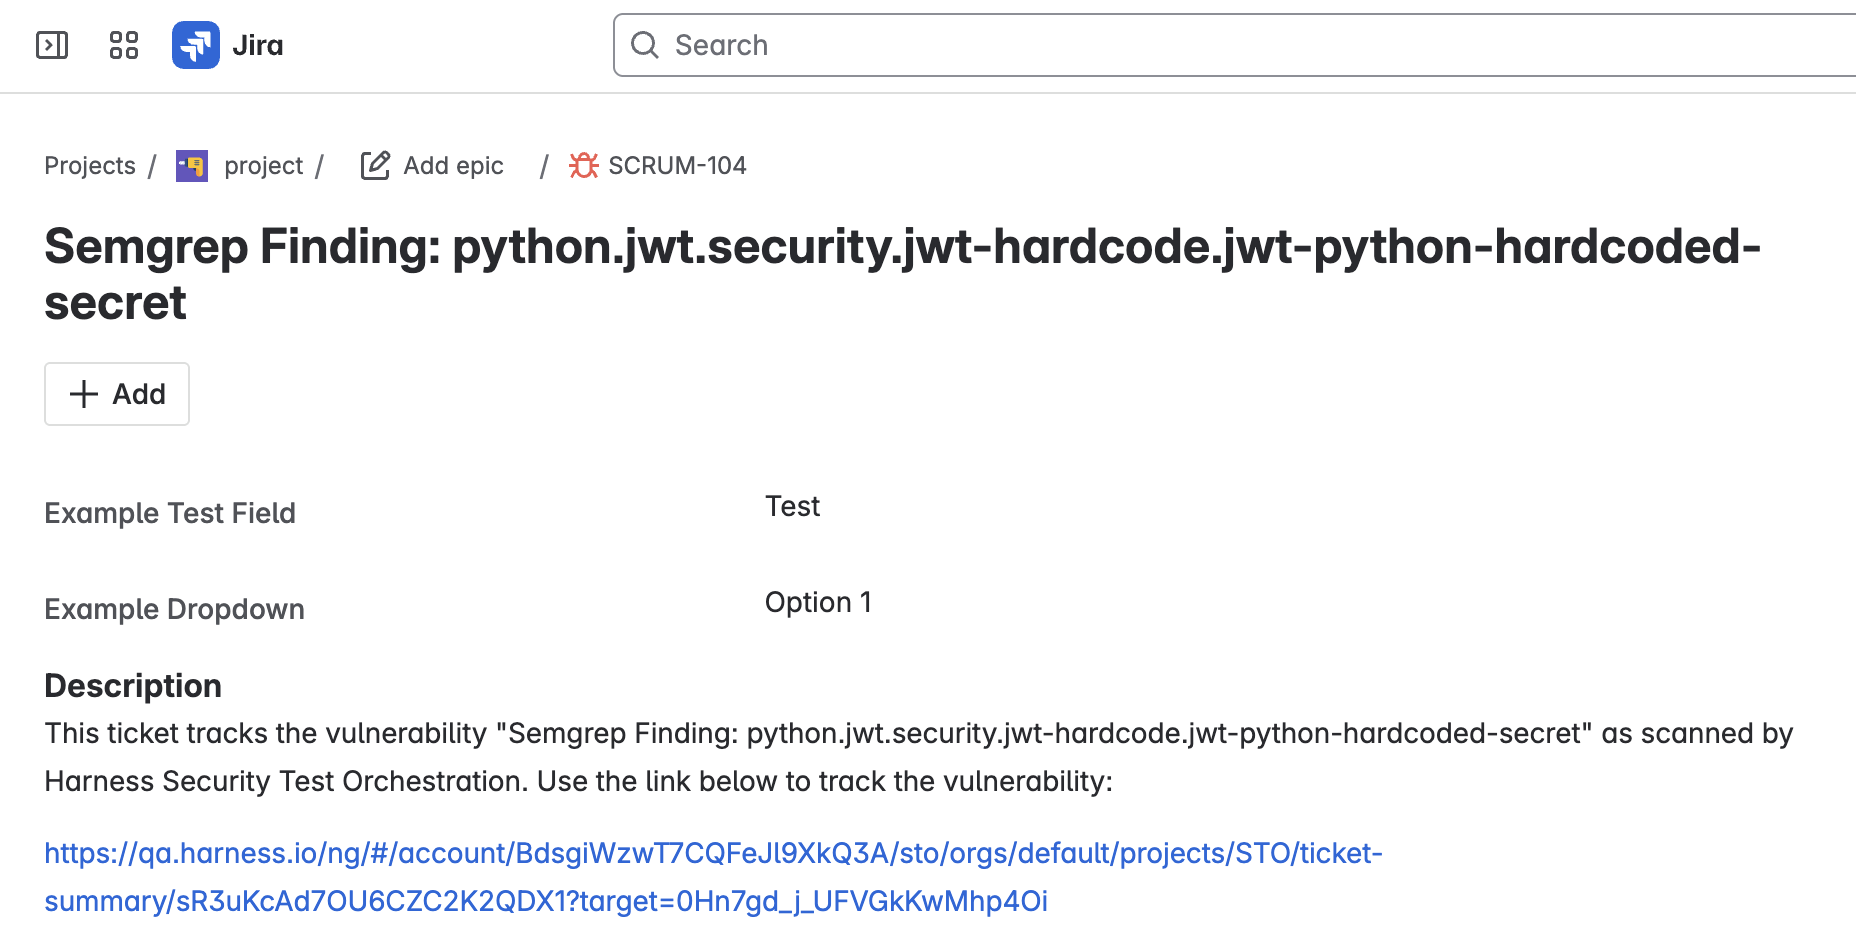
The Jira link will point to a Ticket Summary in the STO UI, which displays all detected issues tracked by the ticket.
Set up Jira integration for STO
The setup process involves creating a Jira Connector in Harness. If you already have a Jira Connector created, you can skip to Configure External Tickets settings.
Generate an API Key from Jira
Create an API key from your Jira account. This key will be used to authenticate Harness with Jira. For detailed instructions, refer to Manage API Tokens for Your Atlassian Account in the Atlassian documentation.
Create a Harness Jira Connector
Set up a Jira Connector to enable communication between Harness and your Jira instance. Follow the steps provided in Connect to Jira documentation to create the connector.
- Create your connector at the Account level.
- Store the Atlassian API key securely as a text secret using the Harness Secret Manager. Do not use external secret stores like Vault for storing this key.
Configure External Tickets settings
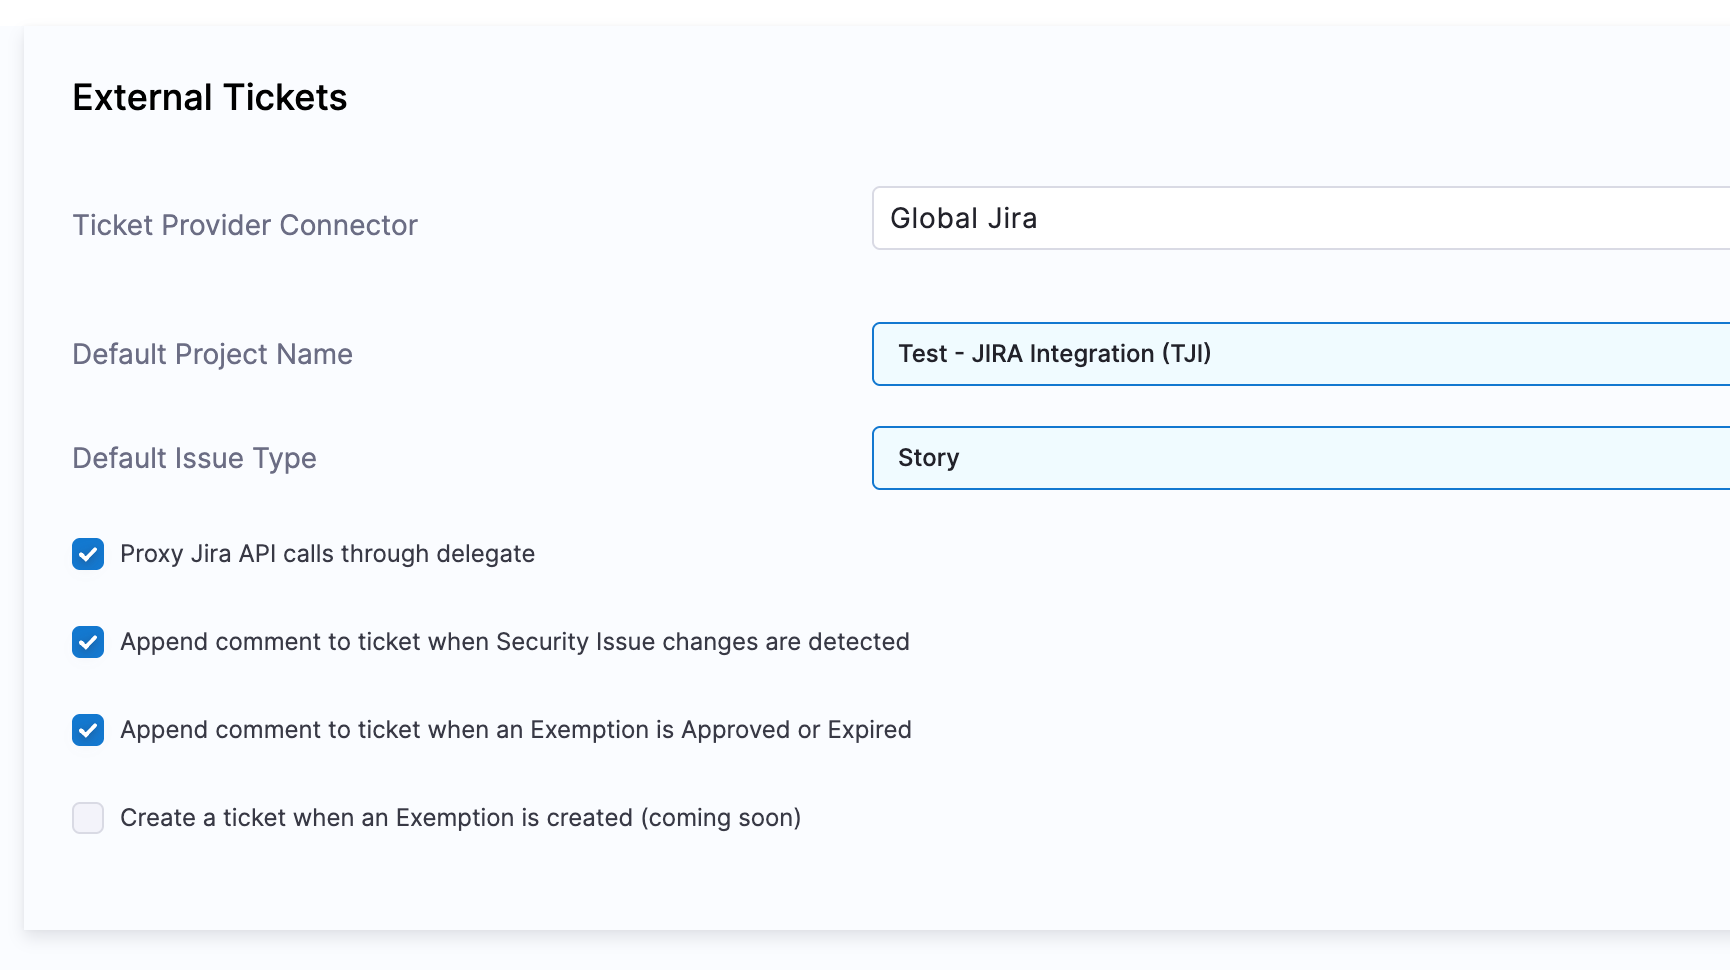
Navigate to Account Settings > External Tickets, and configure the following fields:
- Ticket Provider Connector: Select the Jira connector you created.
- Default Project Name: Choose the default Jira project for ticket creation. This field will present a list of all your Jira projects. You can select a different project while creating tickets.
- Default Issue Type: Choose the default Ticket type for ticket creation. This field will present a list of all your available ticket types. You can select a different ticket type while creating tickets.
Proxy Jira API Calls Through Delegate
Enable this option if your Jira instance is self-hosted or behind a proxy. This allows STO to make API calls through the Harness Delegate.
Append Comments to Tickets When Security Issues Are Detected
Using this option will allow STO to automatically add comments to Jira tickets whenever:
- A new occurrence of the linked security issue is detected
- The issue or occurrence is remediated. Example comment:
[Created by Harness] New findings detected on the Harness platform:
https://your_app.harness.io/ng/#/account/dkdindlskdi/.../executions/dfdfed6-ledDfdsdc14mA/pipeline
Append comment to ticket when an Exemption is Approved or Expired
This option will allow STO to add a comment to the Jira ticket whenever the linked issue’s exemption request is approved, or the exemption expires.
Example comment for exemption request approval:
[Created by Harness] The Exemption associated with this ticket's issue has been approved.
Exemption Reason: False Positive
Requester: example@harness.io
Approver: example@harness.io
Example comment for exemption expiration:
[Created by Harness] The Exemption associated with this ticket's issue has expired.